MobileIron Core: as Source
Required environment’s information
You need to first set up all general prerequisites before proceeding to this guide.
Get the Exodus Companion App on your devices
This setup needs to be done in your Source Tenant and will differ depending on the OS of your targeted devices.
For iOS devices
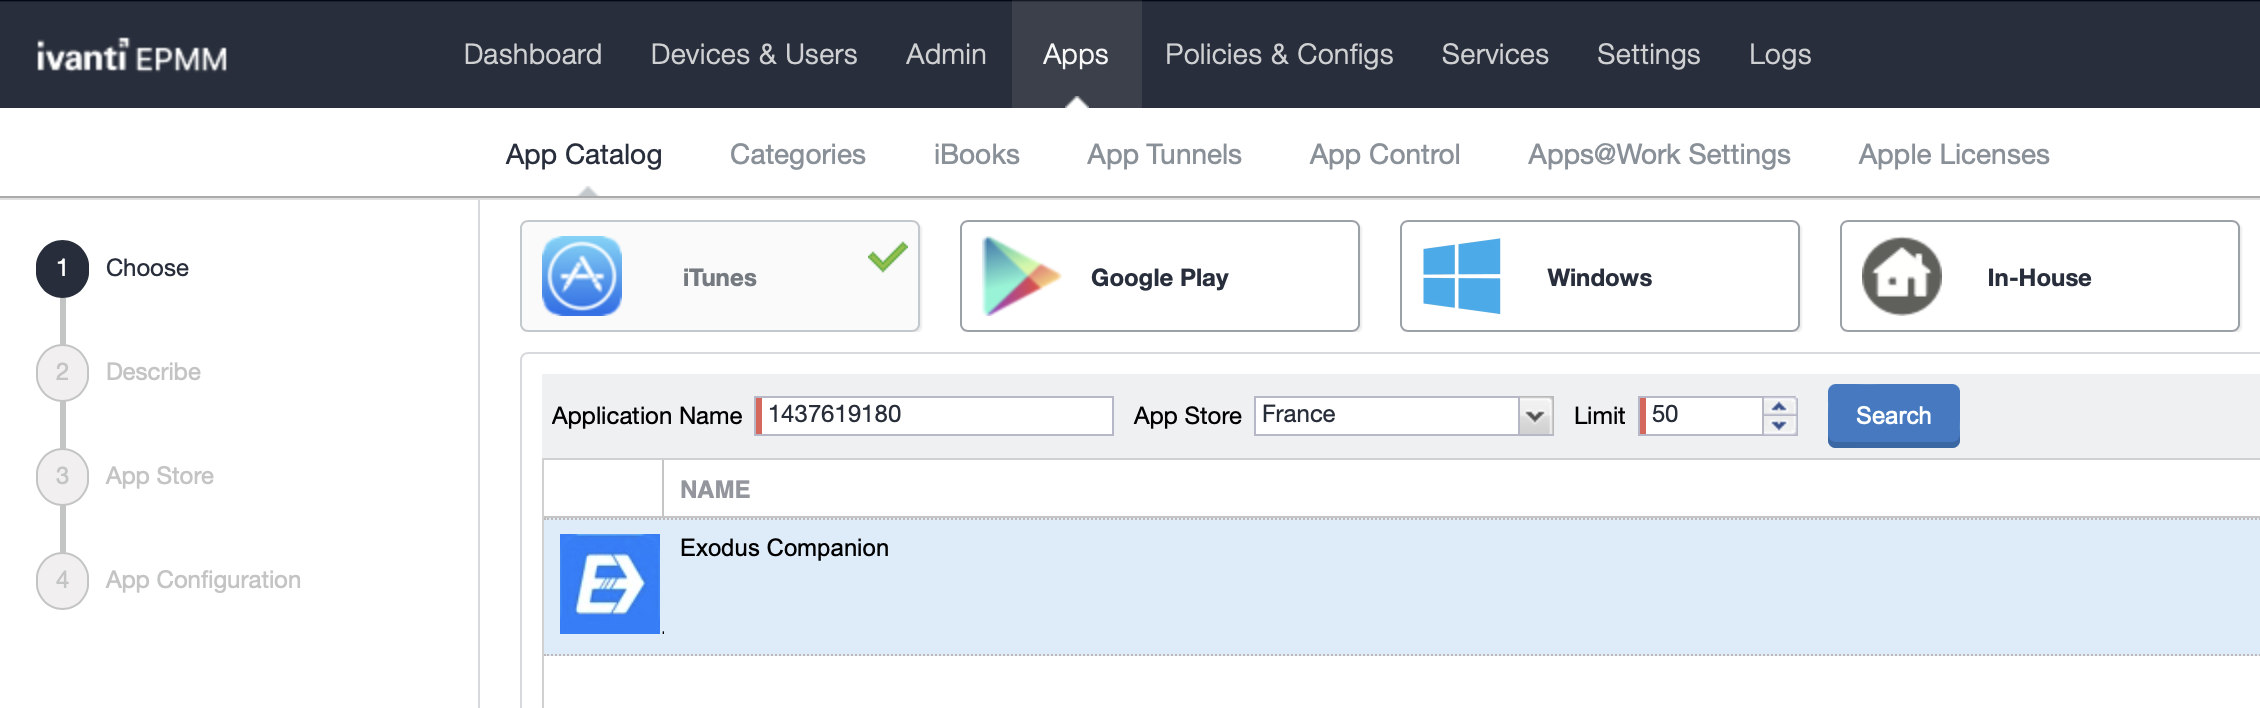
You need to add the Companion App from the App Store to your source UEM’s app catalog via: Apps › Add › iTunes, then add its App Store ID 1437619180 or name Exodus companion in the Application Name field to find it.
App search
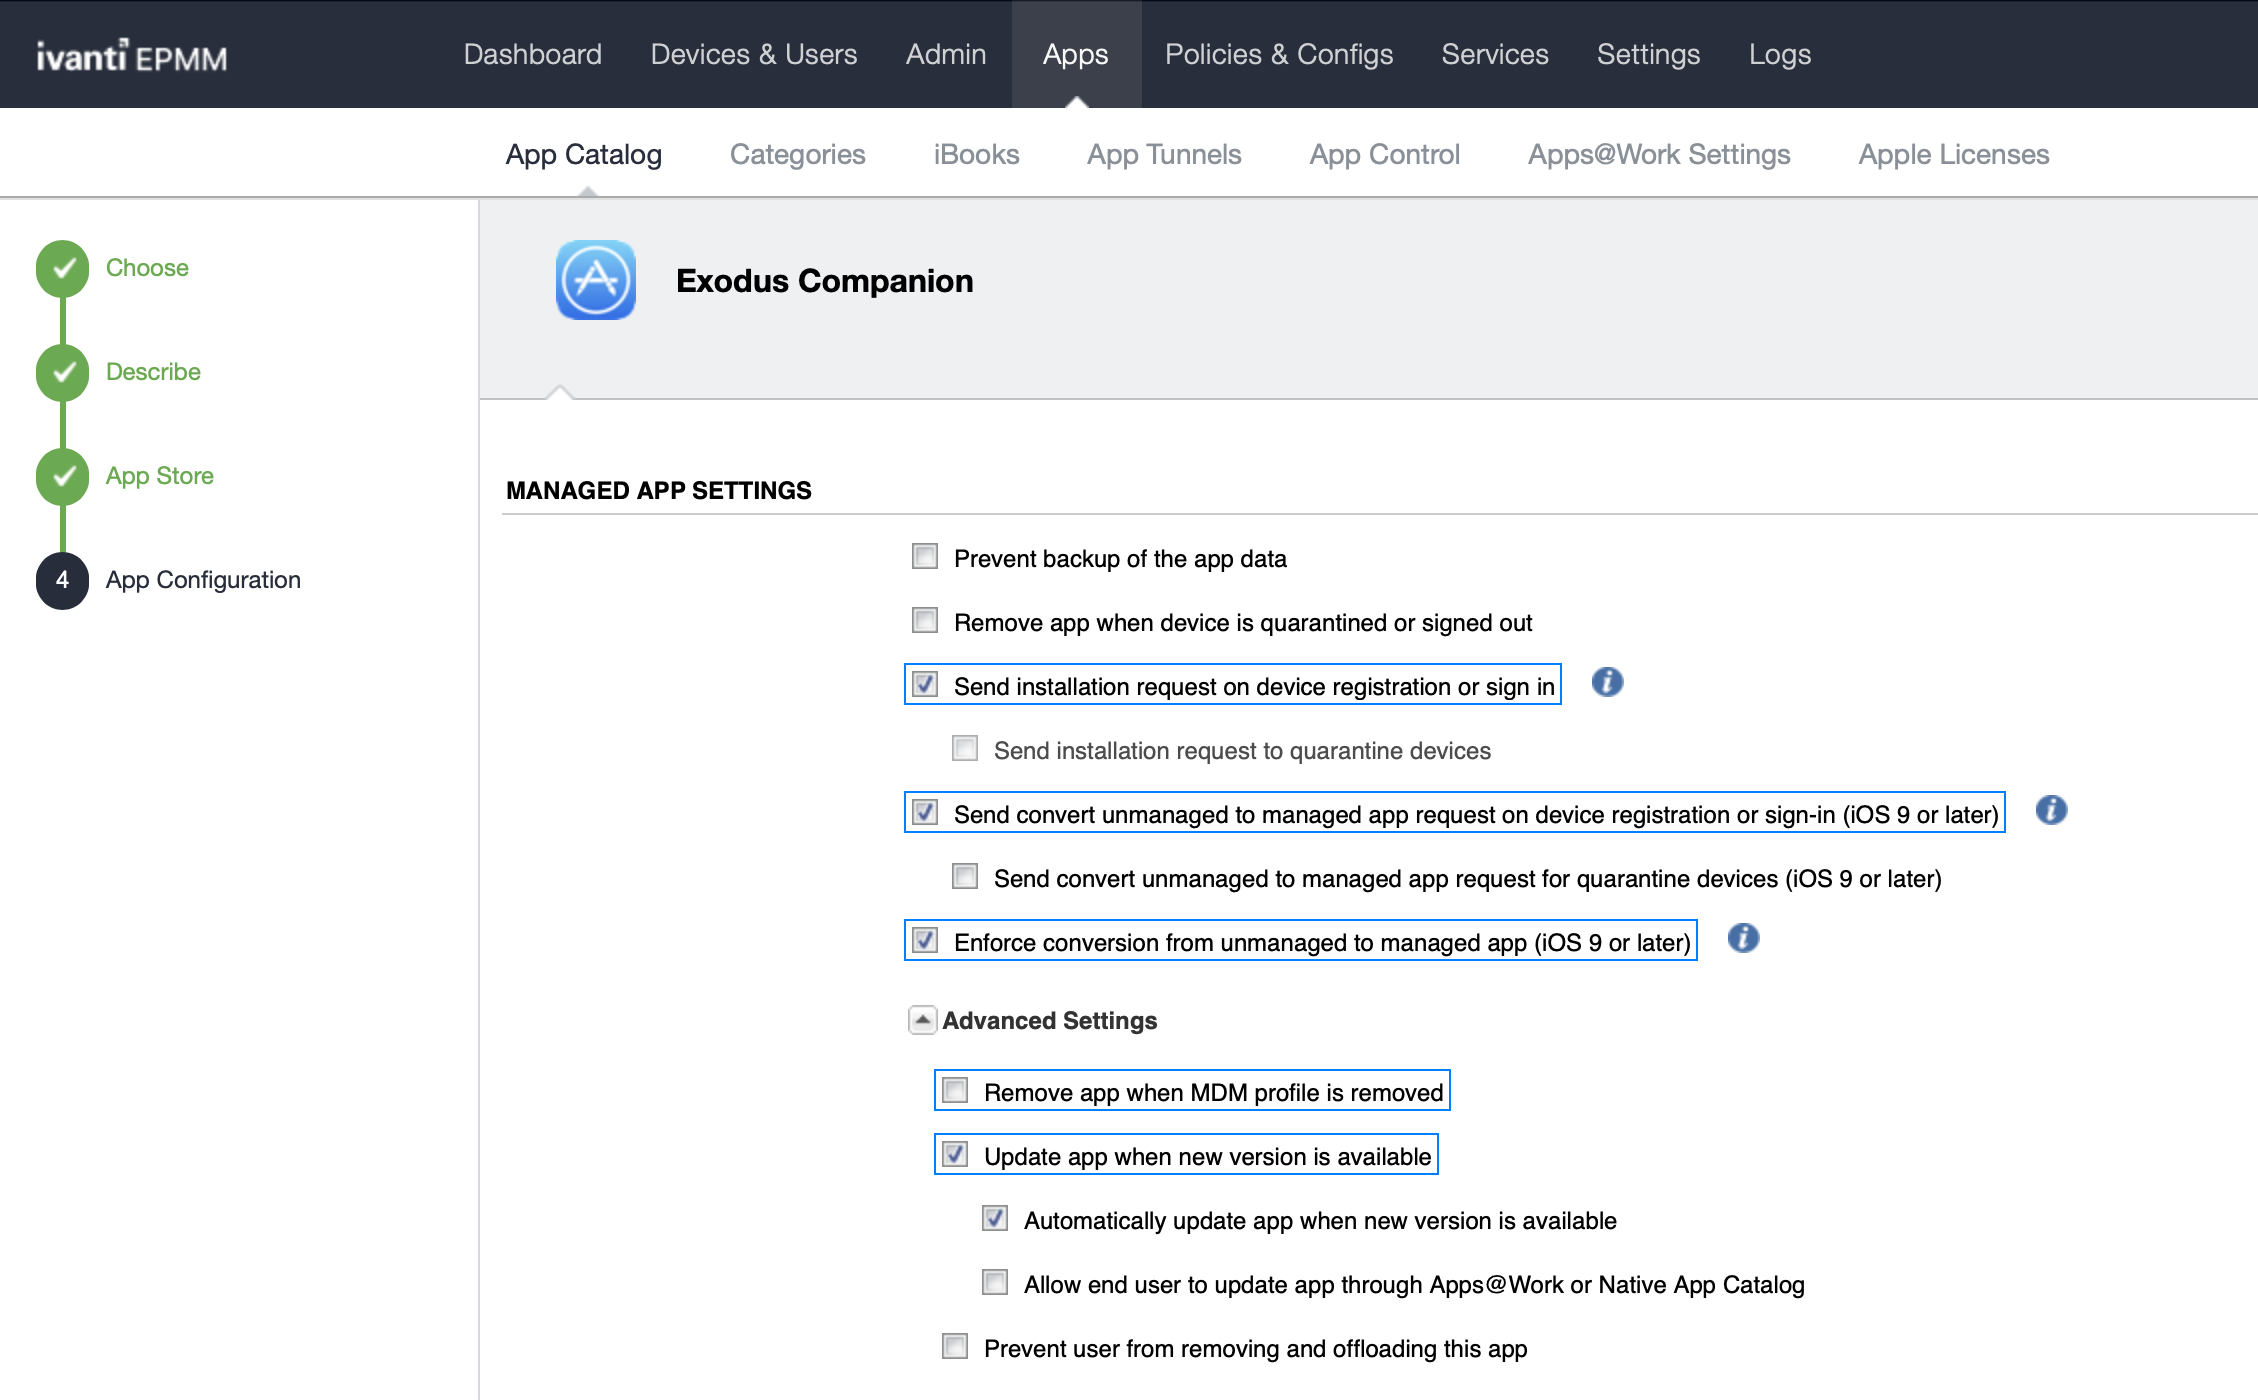
In the App Configuration step, make sure to enable the following options:
- Send installation request on device registration or sign-in
- Send convert unmanaged to managed app request on device registration or sign-in (iOS 9 and later)
- Enforce conversion from unmanaged to managed app (iOS 9 or later)
-
Update app when new version is available with Automatically update app when new version is available
-
And disable Remove app when MDM profile is removed to make sure the companion can continue managing the re-enrollment in your target UEM after retiring from your MobileIron Core source server.
Managed App Settings
-
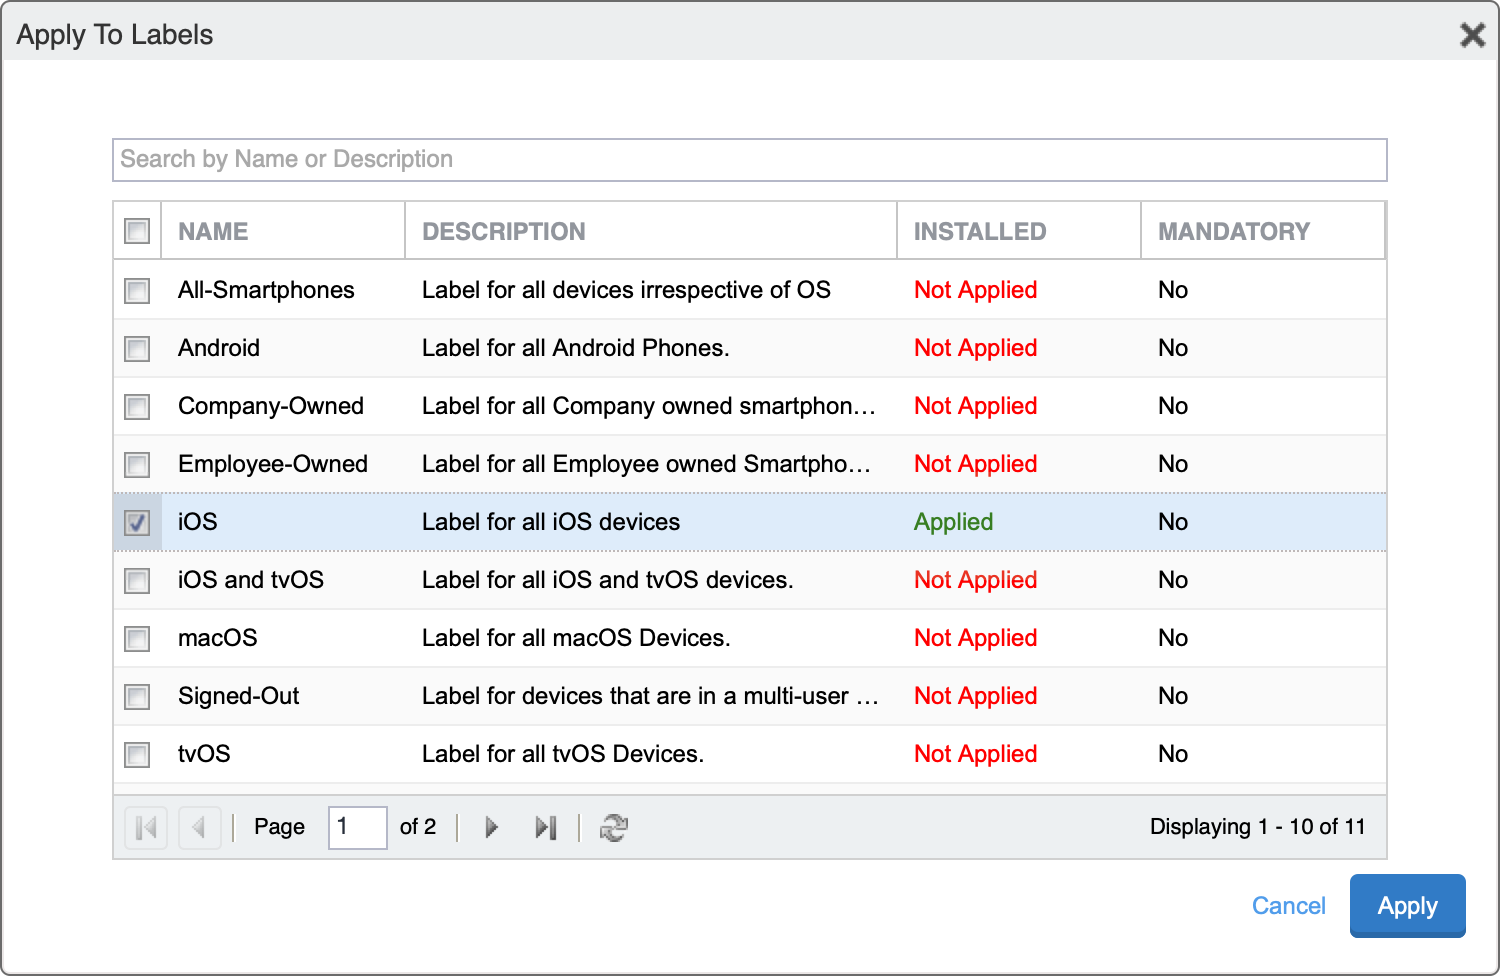
Once the application is set up in your App Catalog, use the Apply To Labels action to install the application on the desired devices.
Applying App to Labels
-
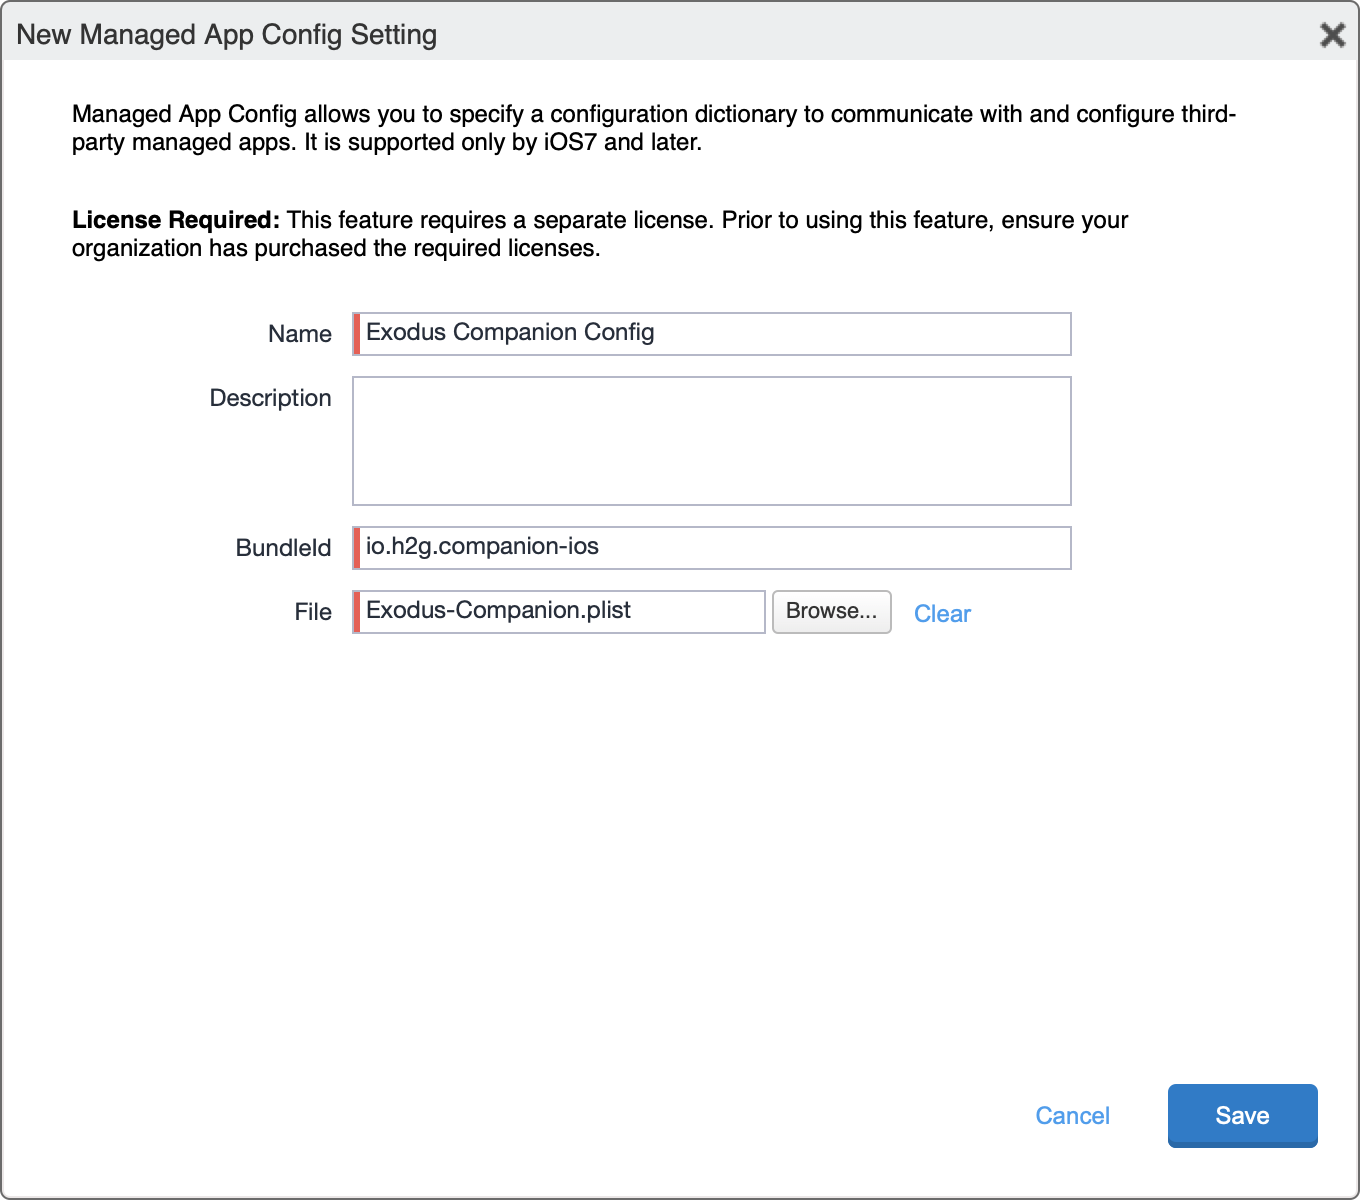
Then, you need to create a Managed App Config by following the menu: Policies & Config › Configurations › Add New › Apple › iOS / tvOS › Managed App Config.
-
In the settings window, enter a name for the configuration, set the bundle ID to
io.h2g.exodus-ios, and upload a Property List (plist) file with the following content:<?xml version="1.0" encoding="UTF-8"?> <!DOCTYPE plist PUBLIC "-//Apple//DTD PLIST 1.0//EN" "http://www.apple.com/DTDs/PropertyList-1.0.dtd"> <plist version="1.0"> <dict> <key>server-url</key> <string>https://{{your-instance}}.exodus.tools/api/</string> <key>serial-number</key> <string>$DEVICE_SN$</string> </dict> </plist>Warning
Replace
{{your-instance}}with the identifier of your Exodus Instance.If you access your Exodus admin console on
https://example.exodus.tools/then the server URL should behttps://example.exodus.tools/api/.Configuring the Managed App Config
-
Finally, use the Apply To Labels action to deploy to Managed App Config on the desired devices.
For Android devices
For Android devices, there is no pre-requirements. Users will install the Companion App themselves by following a dynamic link available in the notification email sent to them by the Exodus server when the migration starts. For more details on the email notification template, please consult the Templates' management documentation.
Work Profile use-case
For a Work Profile device to be able to proceed with the migration, the Exodus Companion App must be installed outside the Work Profile container.
If a user tries to start their device migration from within the Work Profile container, with an approved application, we can help them follow the required steps.
But if a user tries to start their device migration from within the Work Profile container, without an approved application, they will be redirected to an empty page on the Play Store and Exodus will not be able to assist them any further.
This is why for the Work Profile use-case, you must approve the Exodus Companion App from your Google Play Enterprise Account.
Fully Managed use-case
Because every Fully Managed device use-cases imply an Erase command, no further configuration is required.
For Mac computers
Migrations of macOS computers from MobileIron Core are not supported yet.